
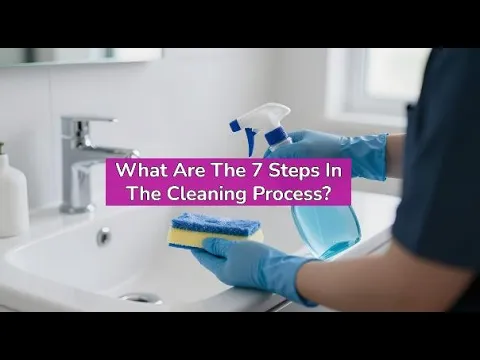
What Are The 7 Steps In The Cleaning Process?
Cleaning is an art that requires a consistent effort and dedication to achieve spotless results. The process goes beyond scrubbing, sweeping or mopping surfaces. There is a standardised procedure followed by professional cleaners to cover all nooks and crannies without any chaos.
Whether you have a studio apartment or a spacious rental house in Melbourne, attention to detail cleaning makes a world of difference. Following proven steps ensures that all areas are cleaned and disinfected meticulously. This helps you maintain a healthy, hygienic property. In this guide, we’ll break down the 7 steps in the cleaning process to help you achieve desired outcomes. From dusting and vacuuming to scrubbing and mopping, stay organised to manage time effectively.
Let’s Get Started!
1. Begin with Preparations
Preparing in advance not only streamlines the cleaning process but also saves you time and energy. This step is all about stocking up on the necessary cleaning supplies, such as microfibre cloths, vacuum cleaners, mops, buckets, scrubbers, sponges, DIY cleaning agents, and disinfectants. Keep all these supplies in a moving caddy.
End of lease cleaning Melbourne professionals recommend preparing a customised cleaning checklist. This will help you clean every inch of the property without fail. If you are moving out of your rental, refer to the property condition report to prevent unfair bond deductions.
Apart from this, move large furniture pieces and appliances to access nooks and crannies without any distraction.
2. Dry Dusting: Tackling Accumulated Dust, Pollen and Debris

Cleaning should always begin with dusting surfaces. Dust mites, loose debris, pollen, and pet dander all contribute to indoor air pollution. It is good to start from higher ceilings, such as fans, vents, walls, light fixtures, and work downwards, such as windows, shelves, floors and carpets for effective results.
You must use a telescopic duster to reach hard to reach areas. For effective dusting, use a damp microfibre cloth. It can effective remove dust bunnies and sticky dirt from almost all hard surfaces.
When it comes to vacuuming, use a HEPA filtered machine and clean your window blinds, upholstery, furniture, window and door tracks, carpets and floors. It can effectively remove embedded dust without damaging the surface.
3. Wet Washing or Applying Solvents
Once you’ve removed dry dust, pay attention to stubborn stains, grime, cooking grease and mould growth. For that, you need effective and surface specific cleaning products:
- White Vinegar: It can effectively remove pet stains, rust, mineral deposits, and grime from windows, fans, refrigerators, microwaves, showerheads and toilet seats. Apply the distilled vinegar and leave it for a few minutes. Do not use it on natural stone surfaces.
- Baking Soda: Apply a baking soda paste to degrease kitchen cabinets, rangehoods, ovens, sinks, garbage disposals, etc. It can effectively clean grout lines, tiles, and natural stone surfaces like countertops. You can even refresh your carpets and rugs.
- Hydrogen Peroxide: Use it to combat mould and mildew from surfaces.
- Wet cleaning is an essential step that can break down gunk and grease while saving you a lot of elbow grease.
4. Scrubbing Stubborn Stains and Grease
The next step is mechanical agitation to remove stains and grease. It uses physical force, such as wiping, scrubbing, and brushing, to loosen dirt and stains. Make sure you use scrubbing pads, soft bristled brushes to clean tile and grout lines, and magic erasers to achieve results quickly.
It is good to use gentle tools on delicate surfaces, such as sponges, to prevent scratches and permanent damage. If you are concerned about your security deposit at the end of tenancy, call experts for a top quality end of lease cleaning Melbourne. They know how to clean different surfaces, preventing damage and costly repairs.
5. Rinsing or Washing Surfaces
Don’t forget to rinse the surface with either hot water. This will help remove remaining gunk and soap residue. You can also wipe down using a clean cloth. After rinsing, dry the surface to avoid streaks or nasty marks.
If you are cleaning windows and glass surfaces, run a rubber squeegee to prevent streaks behind.
6. Disinfecting Surfaces
High touch surfaces, such as doorknobs, light switches, faucets, table tops, cabinet handles, etc are laden with germs and bacteria. These pathogens can cause serious health risks and infections if left untreated. After removing dust and stains, ensure you kill lingering germs using 70 per cent rubbing alcohol. Spray the solution and leave it for a few minutes before wiping.
7. Inspection and Maintenance
This is the final step that will help you spot missed areas and ensure that the cleaning was thorough. When moving out of your rental home, property managers look for areas that may have been overlooked during the process. So, it is essential to check all rooms, hard to reach spots, etc to pass your rental inspection.
Professionally trained cleaners also inspect the property after a guaranteed end of lease cleaning Melbourne to give you peace of mind.
Also, ensure you maintain this routine regularly to achieve a healthy and hygienic indoor environment.
Infographic For A DIY Guide On 7 Step Cleaning Process

Wrapping Up
Whether you have a busy schedule or not, this 7 step house cleaning process can help you maintain a tidy space without any mess or chaos. This will also help you learn time management skills, especially when preparing your rental home for the final inspection.