
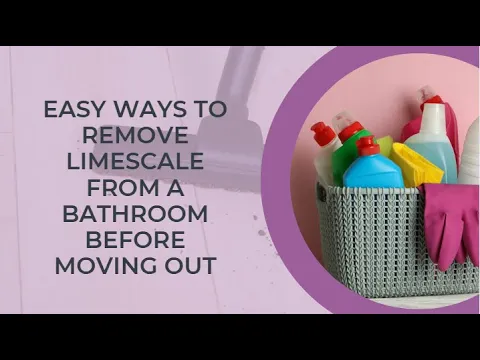
Easy Ways to Remove Limescale from a Bathroom before Moving Out
During final rental inspections, bathrooms are examined more closely than almost any other area of the property. Even minor limescale buildup on taps, tiles, shower screens or showerheads can raise red flags for property managers and lead to unnecessary bond deductions. What many tenants overlook is that limescale is often seen as a sign of poor maintenance rather than normal wear and tear.
That’s why limescale removal plays a very important role in any successful move out clean. This article will provide you with easy ways to remove limescale from a bathroom before moving out. When preparing for professional end of lease cleaning Melbourne, tackling mineral deposits early can help your bathroom look brighter, fresher and inspection ready. With the right approach and simple household solutions, you can eliminate stubborn stains and leave a positive final impression.
Hide
Show
- What Causes Limescale in Bathrooms?
- Removing Bathroom Limescale with White Vinegar
- Tackling Stubborn Limescale in Bathroom Tiles and Fixtures
- Using Lemon Juice to Remove Light Limescale Naturally
- How to Remove Limescale from Taps and Showerheads
- Preventing Limescale Buildup Before Your Final Inspection
- Infographic For Tips To Remove Limescale From A Bathroom
- Wrapping Up
1. What Causes Limescale in Bathrooms?
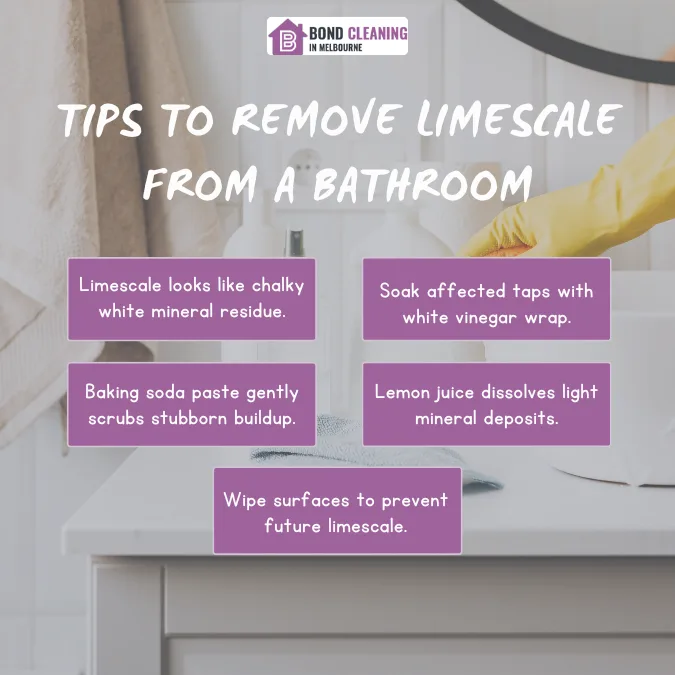
Limescale is a chalky white or grey residue caused by hard water, which contains high levels of minerals such as calcium and magnesium. When water dries on bathroom surfaces, these minerals are left behind and slowly build up over time. Areas like taps, shower screens, tiles, and toilet bowls are especially prone to this problem due to constant water exposure.
From an inspection point of view, limescale buildup can make even a clean bathroom look neglected. Property managers often expect tenants to remove visible mineral deposits before vacating, particularly during end of lease cleaning Melbourne. Understanding what causes limescale helps you identify high risk areas and address them properly before the final inspection.
2. Removing Bathroom Limescale with White Vinegar
White vinegar is one of the most effective and affordable solutions, for removing limescale from bathroom surfaces. Its natural acidity helps break down mineral deposits without damaging most fixtures. To use it, soak a cloth or paper towel in vinegar and wrap it around taps, showerheads or other affected areas. Leave it in place for 30 to 60 minutes before wiping clean.
For shower screens and tiles, spraying undiluted vinegar directly onto the surface works well. After letting it sit, gently scrub with a soft sponge and rinse thoroughly with warm water. This method is particularly useful when completing end of lease cleaning Melbourne on a budget, as it delivers professional looking results without harsh chemicals.
3. Tackling Stubborn Limescale in Bathroom Tiles and Fixtures
For thicker or long standing limescale deposits, baking soda offers an excellent solution. When mixed with a small amount of water, it forms a paste that provides gentle abrasion without scratching bathroom surfaces. Apply the paste to affected areas such as tile grout, sink edges, or toilet rims and allow it to sit for 15 to 20 minutes.
Once the paste has had time to work, scrub gently with a soft brush or sponge and rinse thoroughly. Baking soda is especially effective in areas where limescale has accumulated over months or even years. Combining baking soda with vinegar, can further enhance its effectiveness; making it ideal for deep bathroom cleaning before moving out.
4. Using Lemon Juice to Remove Light Limescale Naturally
Lemon juice is a natural and refreshing alternative for removing light limescale stains. The citric acid found in lemons works similarly to vinegar, helping dissolve mineral deposits while leaving behind a fresh scent. Simply cut a lemon in half and rub it directly onto taps, tiles, or shower screens with mild limescale buildup.
Allow the juice to sit for 10 to 15 minutes before wiping the area clean with a damp cloth. This method works best for smaller problem areas and as a finishing touch after deep cleaning. It’s also a great option for tenants who prefer eco friendly solutions during their end of lease bathroom clean.
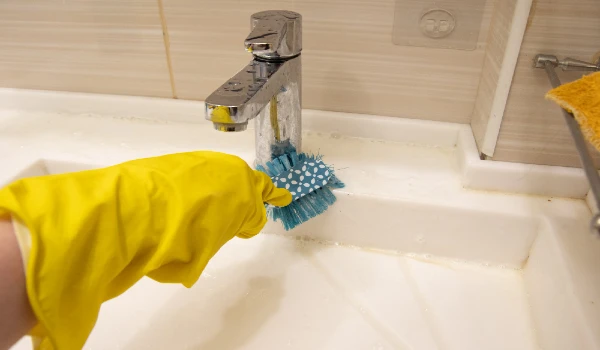
5. How to Remove Limescale from Taps and Showerheads
Taps and showerheads are some of the most noticeable fixtures during a rental inspection, yet they are often overlooked. Limescale can block spray holes and leave visible marks that instantly draw attention. To clean removable showerheads; soak them in a bowl of white vinegar for at least one hour to dissolve mineral buildup.
For fixed showerheads, fill a plastic bag with vinegar and secure it over the fixture using a rubber band. After soaking, scrub gently with an old toothbrush and rinse thoroughly. This small but detailed step can significantly improve the overall appearance of your bathroom and support a successful inspection outcome.
6. Preventing Limescale Buildup Before Your Final Inspection
Once limescale has been removed, taking simple preventative steps can help keep surfaces clean until your inspection day. Wiping down taps, tiles and shower screens after use prevents water from drying and leaving mineral residue behind. Keeping a squeegee in the shower can make this habit quick and easy.
Using a diluted vinegar spray once or twice a week can also help stop limescale from forming again. These preventative measures reduce the need for heavy scrubbing later and ensure your bathroom remains inspection ready. A little ongoing maintenance can go a long way in protecting your bond and completing your move out clean with confidence.
Infographic For Tips To Remove Limescale From A Bathroom
Wrapping Up
Removing limescale doesn’t have to be time consuming or expensive. With common household items, you can effectively tackle mineral buildup and restore bathroom surfaces. Whether you’re cleaning on your own or alongside professional cleaning services, addressing limescale early helps ensure a smoother move out process. A clean, well maintained bathroom not only improves inspection results but also increases your chances of receiving your bond back.