

Create a Timeline: A Tenant’s 7 Day Guide to End of Lease Cleaning
Last minute planning is not the right approach when moving out of your rental property. Procrastination not only elevates stress levels but also leads to failed bond inspections due to half baked end of lease cleaning. Without a proper checklist or strategy, it is easy to miss important areas, leading to costly disputes and penalties.
That’s where a well structured timeline for a thorough and quality end of lease cleaning Melbourne comes in. As a tenant, understand your responsibilities and hand over a property in a reasonable state i.e clean and habitable, minus wear and tear. Worry not! We bring you a 7 day end of lease cleaning timeline to help you manage your move out seamlessly. A well organised strategy can help you save a lot of time, energy and money without a hint of stress.
Let’s Get Started!
Hide
Show
- What is End of Lease Cleaning in Melbourne Rentals?
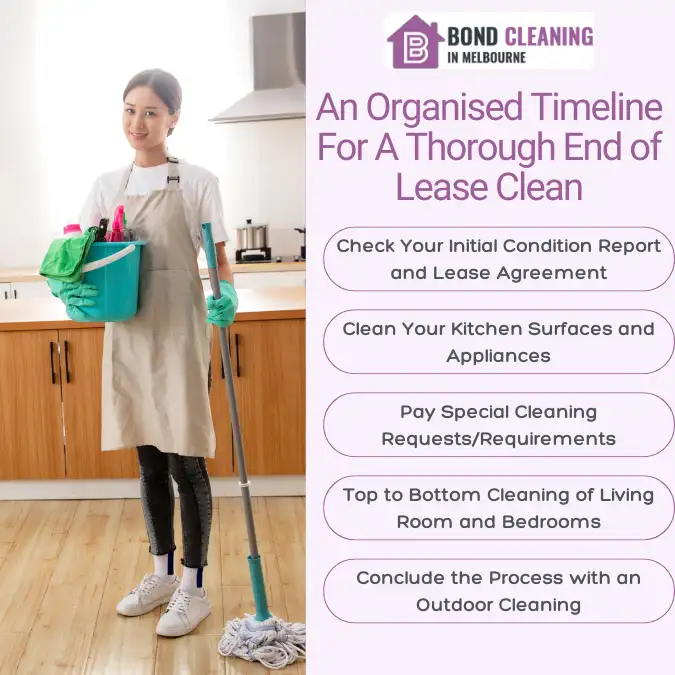
- Day 1: Check Your Initial Condition Report and Lease Agreement
- Day 2: Begin the Preparations
- Day 3: Clean Your Kitchen Surfaces and Appliances
- Day 4: Save the Fourth day for Bathrooms and a Laundry room
- Day 5: Top to Bottom Cleaning of Living Room and Bedrooms
- Day 6: Pay Special Cleaning Requests/Requirements
- Day 7: Conclude the Process with an Outdoor Cleaning
- Infographic For An Organised Timeline For A Thorough End of Lease Clean
- Wrapping Up
1. What is End of Lease Cleaning in Melbourne Rentals?
It is a one time cleaning session, a legal requirement to help pass the final inspection at the end of a tenancy. Under the Residential Tenancy Laws in Victoria, tenants/renters are responsible for returning a property in the same condition as it was at the start of a lease, except for normal wear and tear.
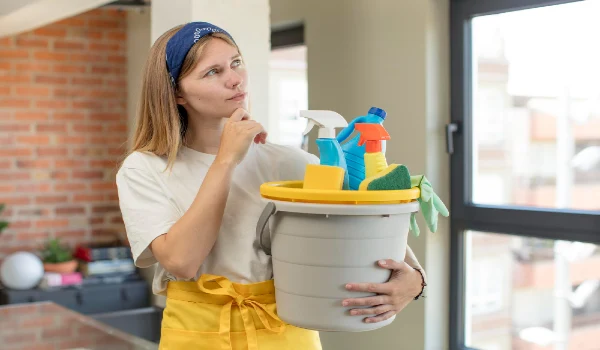
Bond cleaning, or end of lease cleaning, is the process of removing dirt, dust, stubborn stains, streaks, grime, grease, germs, and bad odours from every nook and cranny to create a healthy, hygienic space for the new occupant. With a proper cleaning checklist, you can easily meet your tenancy obligations and prevent bond deductions, which is equivalent to four weeks’ rent.
Here is a day to day cleaning breakdown for spotless results.
2. Day 1: Check Your Initial Condition Report and Lease Agreement
First things first! Review your tenancy agreement and understand specific cleaning requests or clauses set by your landlord. When renting with pets, landlords often include a professional carpet and upholstery cleaning as a cleaning requirement when moving out.
Also, check your initial condition report to distinguish between normal wear & tear and actual damage. Compare it with your current property’s condition and create a proper checklist to achieve immaculate results.
These documents specify the bond cleaning standards, saving you time, bond deductions and disputes. Do this in advance and prepare your mind to avoid last minute chaos and surprises.
3. Day 2: Begin the Preparations
Before getting into the cleaning process, vacate the property by removing personal items and unwanted waste. Get rid of broken, damaged or stale items. Make sure you pack your household belongings. This will help you access hard to reach areas for cleaning seamlessly, saving you time and energy.
Next, stock up on necessary cleaning supplies, such as a vacuum cleaner, microfibre dusters, magic erasers, brushes, sponges, mops, and eco friendly cleaning products to banish stubborn stains and grime. Understand the different between sustainable vs chemical cleaning and make a smart decision when choosing household cleaning products.
4. Day 3: Clean Your Kitchen Surfaces and Appliances
Many end of lease cleaning Melbourne experts begin the process from the dirtiest rooms of a property, i.e a kitchen. It can take the entire day to tackle every nook and cranny. Here is a brief guide to cleaning your kitchen like a pro:
- Start by removing cobwebs, insect marks, and dust from ceilings, walls, windows, light fixtures, fittings, and switchboards.
- Once emptied, wipe down your cabinets and cupboards using baking soda and warm water. This will help you remove cooking grease, grime and gunk without causing any damage to the wooden surface.
- Next, de grease your range hood and range hood filter, oven (inside and out), trays, grills, microwave, and dishwasher.
- Also, pay attention to the refrigerator. Remove and submerge racks and drawers in hot, soapy water. Spray white vinegar inside the fridge, gaskets and crannies and scrub with a brush. Wipe down the exteriors and clean behind the fridge.
- Sparkle clean the countertops and backsplash area.
- Remove limescale, grime, and stains from the stainless steel sink and chrome faucets using mild dishwashing soap and baking soda.
- Unclog and deodorise garbage disposal naturally
- Sweep and mop floors.
5. Day 4: Save the Fourth day for Bathrooms and a Laundry room
Did you know that most tenants lose their bond money due to filthy bathroom fixtures and fittings? Therefore, it is essential to dedicate a whole day to deep cleaning your bathrooms and laundry room. First, check for condensation and mould spores. If your lease agreement requires mandatory mould removal, treat it with hydrogen peroxide, tea tree oil, or white vinegar. Clean the exhaust fan and vents to impress your landlord.
If not, remove limescale and soap scum from shower heads, glass doors, and walls using a vinegar solution. Clean the curtains, bathtubs and countertops. Polish the mirror and disinfect the taps and towel holder. Make sure you clean and renew tile grouts, remove brown stains from a toilet seat and around the rim area. In a laundry room, clean the dryer and washing machine, taps, and walls. Also, unclog the drains using all natural products.
A clean, spotless and fresh smelling bathroom and a laundry room make a world of difference. It can help you pass your rental inspection and secure your full bond.
6. Day 5: Top to Bottom Cleaning of Living Room and Bedrooms
Start by dusting your ceiling walls, crown mouldings, air vents, light fixtures and fittings using a microfibre cloth. Make sure you wipe down the light switches, shelves, picture frames, and windows inside and outside. Make sure you clean the blinds, curtains, window sills and tracks. Vacuum the skirting boards and baseboards to promote a healthy indoor environment.
When cleaning your bedroom, pay attention to the furniture, mattress, and wardrobe to tackle dust, dirt, and grime. Spot clean the walls using all natural products, vacuum carpets, sweep and mop the floors for efficient results.
7. Day 6: Pay Special Cleaning Requests/Requirements
If your lease agreement requires steam cleaning of carpets, rugs or pet control, hire the best company to leave a great impression on your landlord. Steam cleaning is a great way to dislodge dirt, grime, bad odours and stains from delicate carpets and upholstery without causing any damage to the surface. Pet control, on the other hand, is required when you have pets in your rental.
8. Day 7: Conclude the Process with an Outdoor Cleaning
Make sure you clean the patio area, decks, garage and lawn when moving out of your rental home. This becomes essential when you live in humid weather conditions. Pressure wash your windows from outside if accessible, remove stains and grime from patio floors, wipe down furniture, and remove cobwebs and grime from garage walls and floors. Do not forget to clean the lawn and driveway. You can also hire experts for a top quality end of lease cleaning Melbourne to secure your bond without any stress.
Infographic For An Organised Timeline For A Thorough End of Lease Clean
Wrapping Up
End of lease cleaning is not rocket science. Make sure you plan it like a pro, create a seven day timeline to stay organsied throughout the process and meet strict bond cleaning expectations without feeling stressed or overwhelmed.