

How To Degrease Kitchen Cabinets Like A Pro
Grease on kitchen cabinets has a sneaky way of building up without you even noticing. One day, your cabinets look fresh and glossy and the next, they feel sticky, dull and coated with a stubborn film. Cooking oils, steam, fingerprints and dust combine to create a thick layer that ordinary wiping simply can’t remove. Over time, this grime not only looks unpleasant but can also damage the cabinet finish.
Whether you’re maintaining a clean home or preparing for a professional end of lease cleaning Melbourne, properly degreasing your kitchen cabinets is essential. Landlords and property managers often inspect kitchens closely, and greasy surfaces can cost you part of your bond. Here’s a step by step guide to make your kitchen cabinets spotless and shine again. With the right techniques and tools, you can tackle even the toughest buildup like a pro.
Hide
Show
- Understand the Type of Kitchen Cabinet Surface First
- Start with Dry Cleaning to Remove Loose Dirt in the Cabinet
- Use Gentle Homemade Degreasers for Everyday Grime
- Tackle Stubborn Grease with Baking Soda or Commercial Cleaners
- Clean Handles, Corners and Hidden Areas Thoroughly
- Dry and Polish the Cabinets for a Streak Free Finish
- How to Maintain Regular Cabinet Cleaning to Prevent Future Buildup
- Infographic For The Best Way To Clean Greasy Kitchen Cabinets
- Wrapping Up
1. Understand the Type of Kitchen Cabinet Surface First
Before grabbing the nearest cleaner, take a moment to identify what your cabinets are made of. Wood, laminate, painted MDF and vinyl finishes all react differently to moisture and chemicals. Using harsh or unsuitable products can cause fading, peeling or warping, which is far more expensive to fix than a bit of grease.
For example, solid wood cabinets require gentle cleaners and minimal water, while laminates can handle slightly stronger solutions. Reading the manufacturer's instructions or testing on a hidden spot first can prevent accidental damage. This small step makes sure that you clean effectively without compromising the finish.
2. Start with Dry Cleaning to Remove Loose Dirt in the Cabinet
It might sound counterintuitive, but wet cleaning isn’t your first step. Begin by removing loose dust, crumbs and surface debris. Use a microfibre cloth or a soft brush attachment on your vacuum to clear away particles that could smear or scratch the surface when wet.
Dry cleaning also helps you see where the real grease hotspots are, usually around handles, above the stove, and near cooking areas. By eliminating loose dirt first, your cleaning solution can directly target the grease instead of turning into muddy streaks.
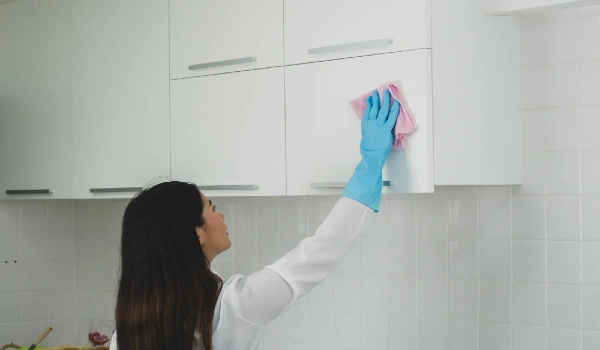
3. Use Gentle Homemade Degreasers for Everyday Grime
For light to moderate grease; simple DIY solutions work wonders. A mix of warm water and a few drops of dishwashing liquid is often enough to break down oily residue. Dish soap is designed to cut through fat, making it perfect for kitchen surfaces.
Another effective option is white vinegar diluted with water. It naturally dissolves grease and sanitises surfaces at the same time. Dip a soft sponge or cloth into the solution, wring it out well, and wipe gently. Avoid soaking the cabinets, as excess moisture can seep into the edges and cause swelling.
4. Tackle Stubborn Grease with Baking Soda or Commercial Cleaners
Some areas, especially above the stove, develop thick, sticky patches that won’t budge with mild cleaners. This is where baking soda becomes your best friend. Make a paste using baking soda and a little water then apply it to greasy spots. Its mild abrasive texture helps lift grime without scratching.
If the buildup is still persistent, consider using a specialised degreasing product designed for kitchens. Choose non toxic and surface safe formulas to avoid damage. Professional cleaners often rely on these products during end of lease cleaning Melbourne jobs to achieve deep, inspection ready results quickly and efficiently.
5. Clean Handles, Corners and Hidden Areas Thoroughly
It’s easy to focus only on flat surfaces, but grease loves to hide in corners, grooves, and around handles. These spots collect fingerprints and oil more than any other area and are often the first things property inspectors notice.
Use an old toothbrush or a small detailing brush to scrub tight spaces gently. Pay attention to hinges, edges, and under cabinet sections. Taking the time to clean these overlooked areas gives your kitchen a truly professional finish rather than a rushed, surface level clean.
6. Dry and Polish the Cabinets for a Streak Free Finish
After cleaning, always dry the cabinets immediately with a soft, clean cloth. Leaving water to air dry can cause streaks, dull patches, or water marks, especially on glossy or painted finishes. Drying also prevents moisture from damaging the cabinet material over time.
For extra shine, you can buff the surface lightly with a dry microfibre cloth or use a suitable polish for wood cabinets. This final step restores the natural look of the cabinets and makes them appear freshly installed, giving your entire kitchen a brighter and cleaner feel.
7. How to Maintain Regular Cabinet Cleaning to Prevent Future Buildup
The secret to degreasing like a pro isn’t just deep cleaning; it’s consistency. Wiping cabinets weekly with a mild cleaner prevents grease from accumulating in the first place. Quick maintenance is far easier than tackling months of hardened grime.
If you’re preparing to move out, adding cabinet cleaning to your routine checklist ensures you won’t have last minute stress. Proper upkeep makes major tasks like end of lease cleaning Melbourne smoother and faster, saving both time and effort when inspection day arrives.
Infographic For The Best Way To Clean Greasy Kitchen Cabinets

Wrapping Up
Degreasing kitchen cabinets doesn’t have to be complicated or exhausting. With the right approach, you can restore even the greasiest cabinets to their original shine. A clean kitchen instantly elevates the entire home and leaves a great impression, whether for everyday living or a final property inspection. Follow these pro tips, stay consistent and your cabinets will stay spotless, fresh and grease free all year round.